How to Delete a Group Chat on Messenger
If you're wondering whether you can delete a group chat on Facebook Messenger or not, you've come to the right place.
This article will let you know how to delete a group chat, how to do it, and its step-by-step process.
Deleting a group chat on messenger is possible.
It does not matter if you are using android phone, iPhone, laptop, or even a tablet.
The steps to delete a group chat on messenger are similar.
Before walking through the steps, note that deleting a group chat will make you delete the conversation thread from your phone.
It won't delete the existing conversation from the group member's phone unless they manually delete it.
Also, to delete a group chat, you must be the admin of the group.
Below are the five steps to successfully delete a group chat.
1. Select the group chat you want to delete
2. Access the group members
3. Remove the group members
4. Exit the group
5. Select the 'Leave' option
Now, let's go through the step-by-step process!
1. Select the group chat you want to delete

If you have the Facebook Messenger app installed on your phone or desktop, then you must follow these steps.
Identifying the messenger app is easy: look for a chat icon that has a horizontal thunderbolt symbol inside it.
The color of this app icon is a mix of blue, purple, and pink.
This chat icon is enclosed in a white square box.
First, open the messenger app and log in with your Facebook credentials.
If you're already logged in, skip the above step.
All your messenger chats will be visible to you on the home screen.
Scroll through these chats to find out the group chat you wish to delete.
If there are too many chats, finding the desired group chat can be difficult.
Also, finding a particular group chat can be time-consuming if you intend to delete an older group chat.
In that case, hover over the search bar at the top of the screen and type the name of the group chat.
Once found, select the chat.
All the conversations in the group chat will be visible to you.
Don't delete all these conversations and assume you've successfully deleted the group chat!
2. Access the group members
Tap on the group chat's navigation bar at the top: the name of the group.
You can also click on the 'i' button at the top right of the group chat.
You'll be directed to the group settings area.
There are multiple categories such as 'Customization,' 'Chat info,' etc.
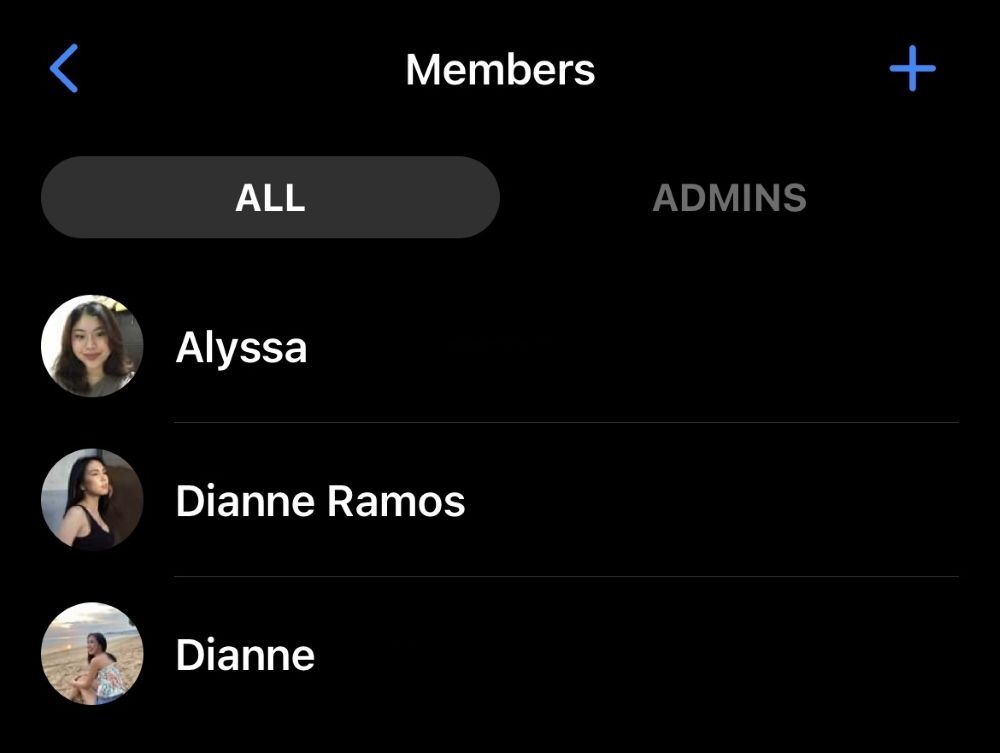
Go to the 'Chat info' category and select 'See group members.'
A list of group members will be visible to you.
There are two tabs: 'All' and 'Admins.'
As the name suggests, 'All' shows all members of the group chat.
'Admins,' on the other hand, only shows the admin members of the group.
To check whether you're an admin, toggle to the 'Admins' tab.
If your name appears there, you can successfully delete the group chat.
If your name doesn't appear there, you are not a group admin.
In that case, you cannot delete the group chat.
A solution to this problem would be by requesting to become the group admin.
Once you are the admin, the control comes into your hand, and you can follow the next steps.
3. Remove the group members
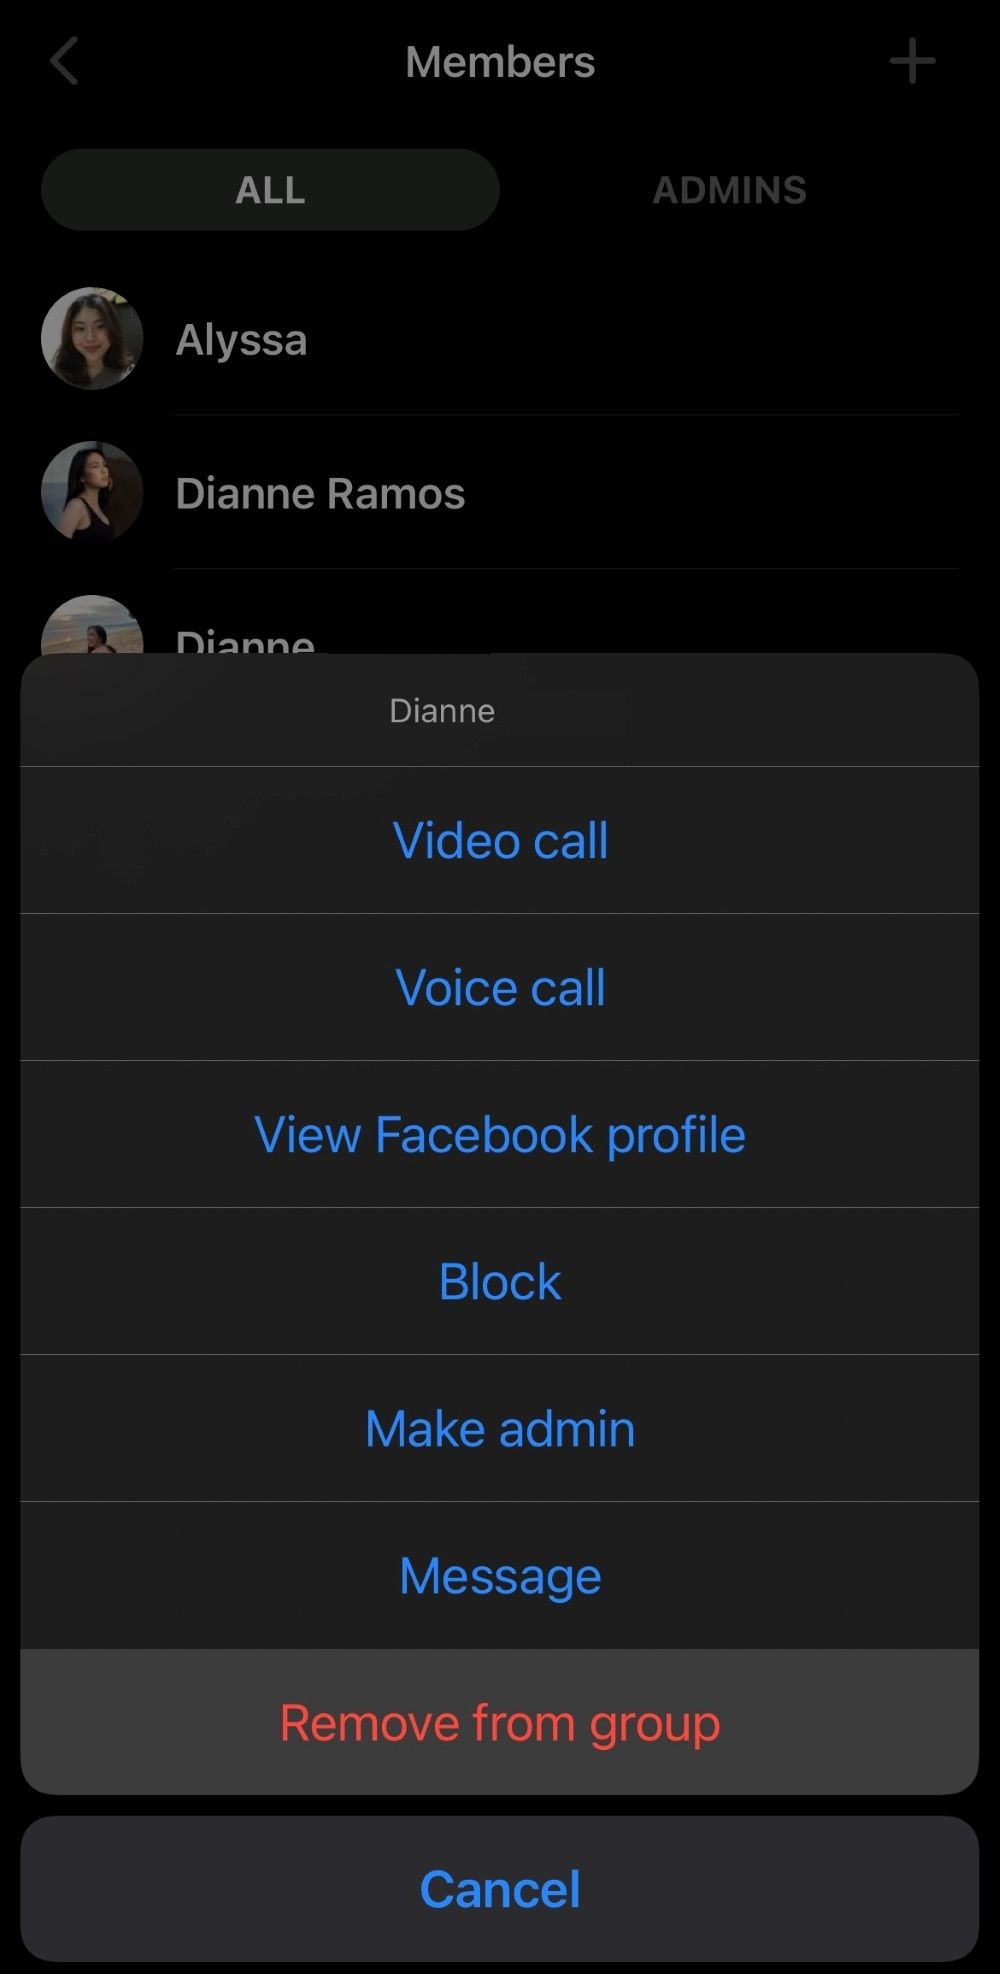
Toggle to the 'All' tab in the group members area.
Then, manually select each group member and click on the 'Remove from Group' option.
You cannot select multiple members at once because Facebook Messenger does not have this feature.
Remove all the group members.
If there are no members, you can skip the above step.
4. Exit the group
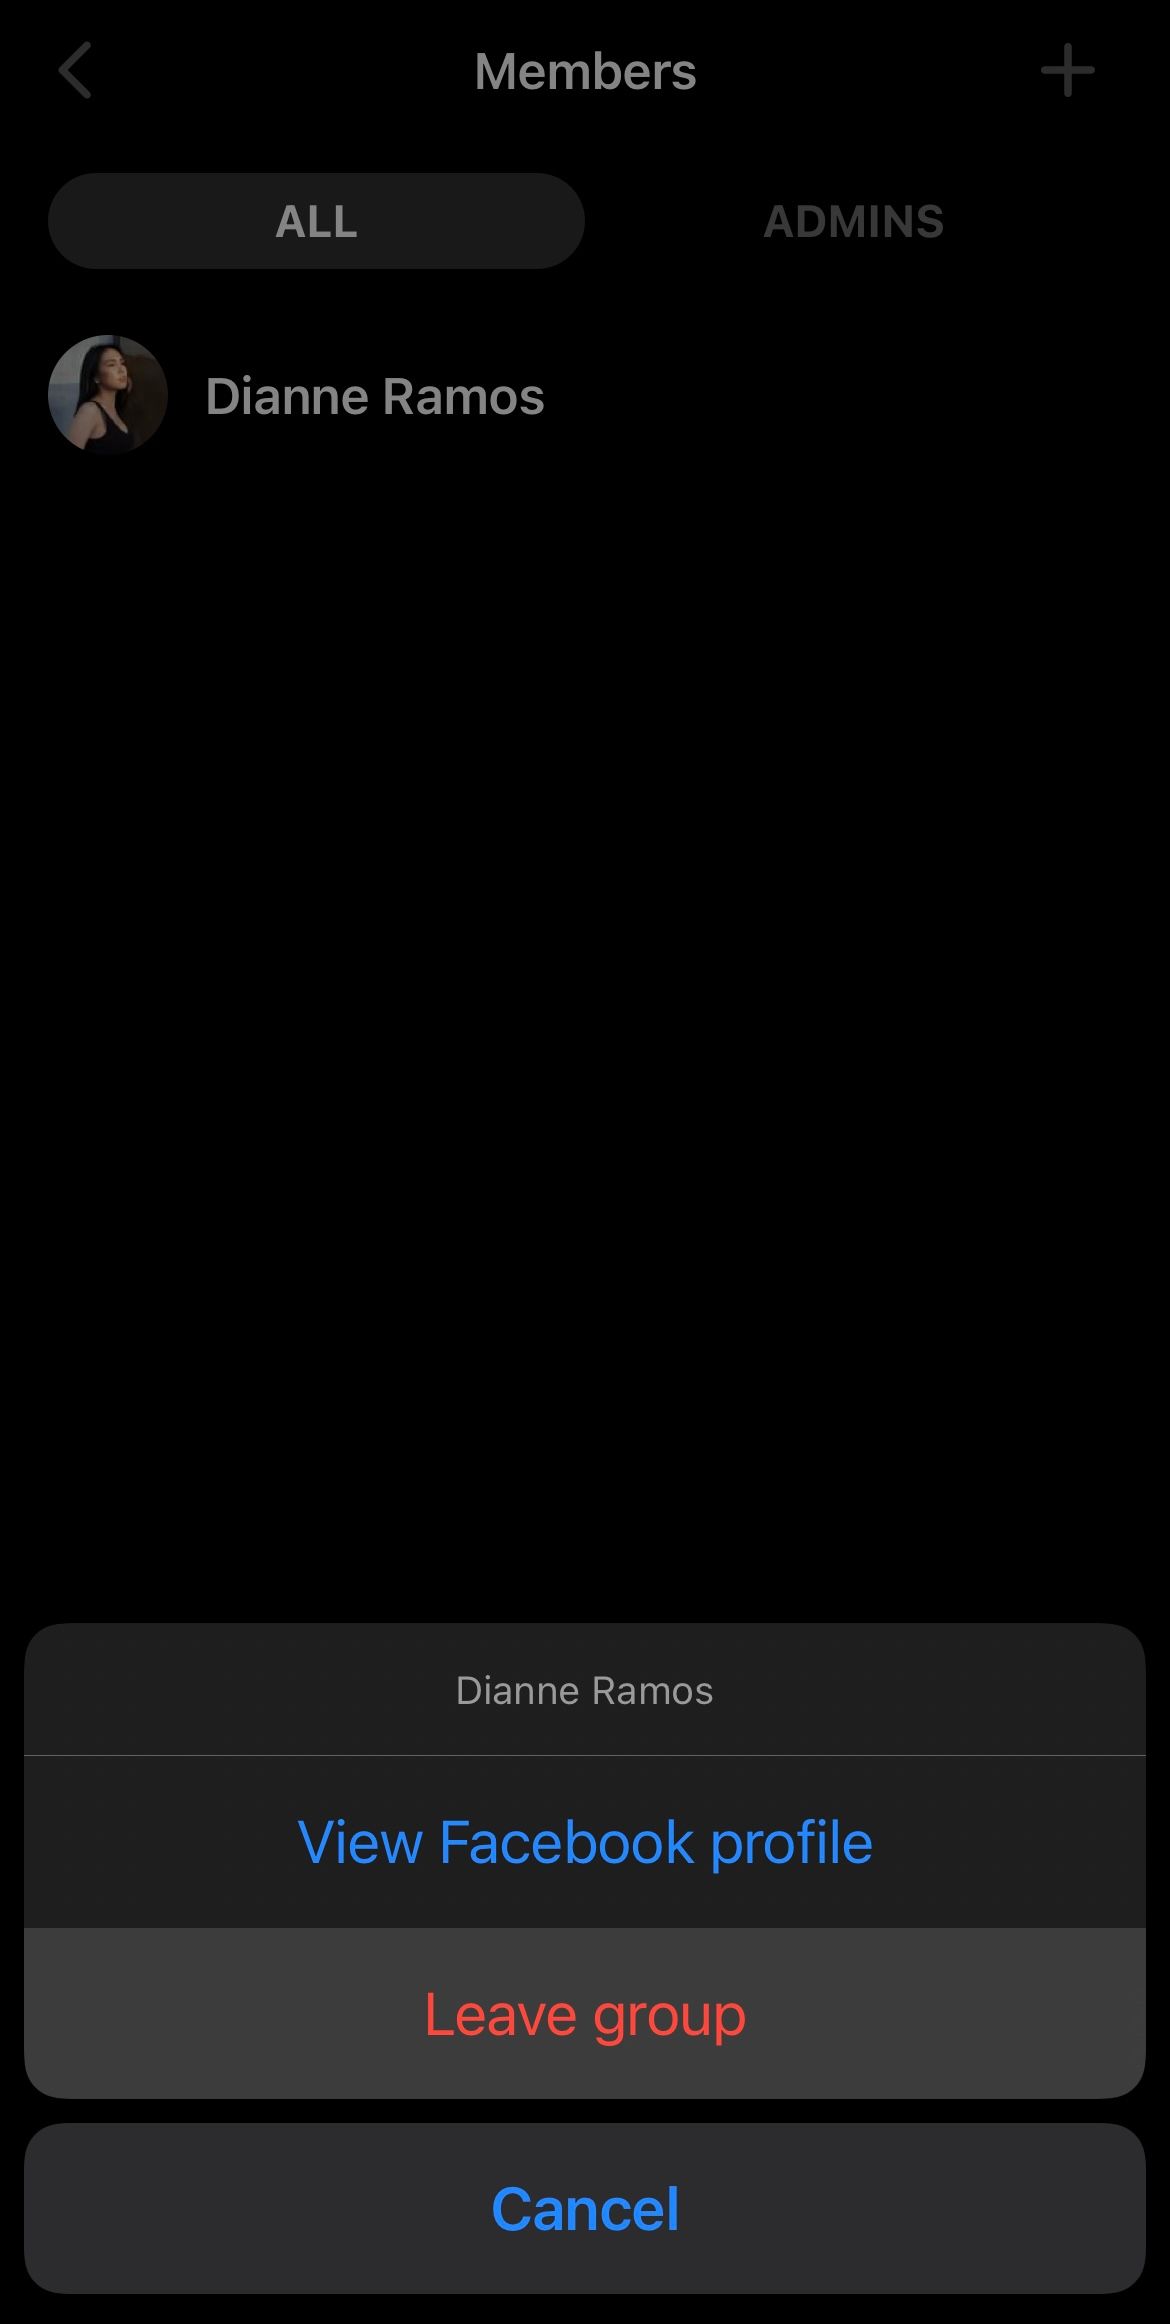
Now tap on your name in the group member.
Your information will be visible.
Scroll to select the 'Leave Group' option.
Before selecting this option, check again if you're the only member left in the group.
If there are any other members left by mistake, select them and remove them from the group.
If you leave the group without removing all the members, the group chat won't be deleted.
Only you will be left in the group.
The other members can continue to chat, keeping the group chat on.
5. Select the 'Leave' option
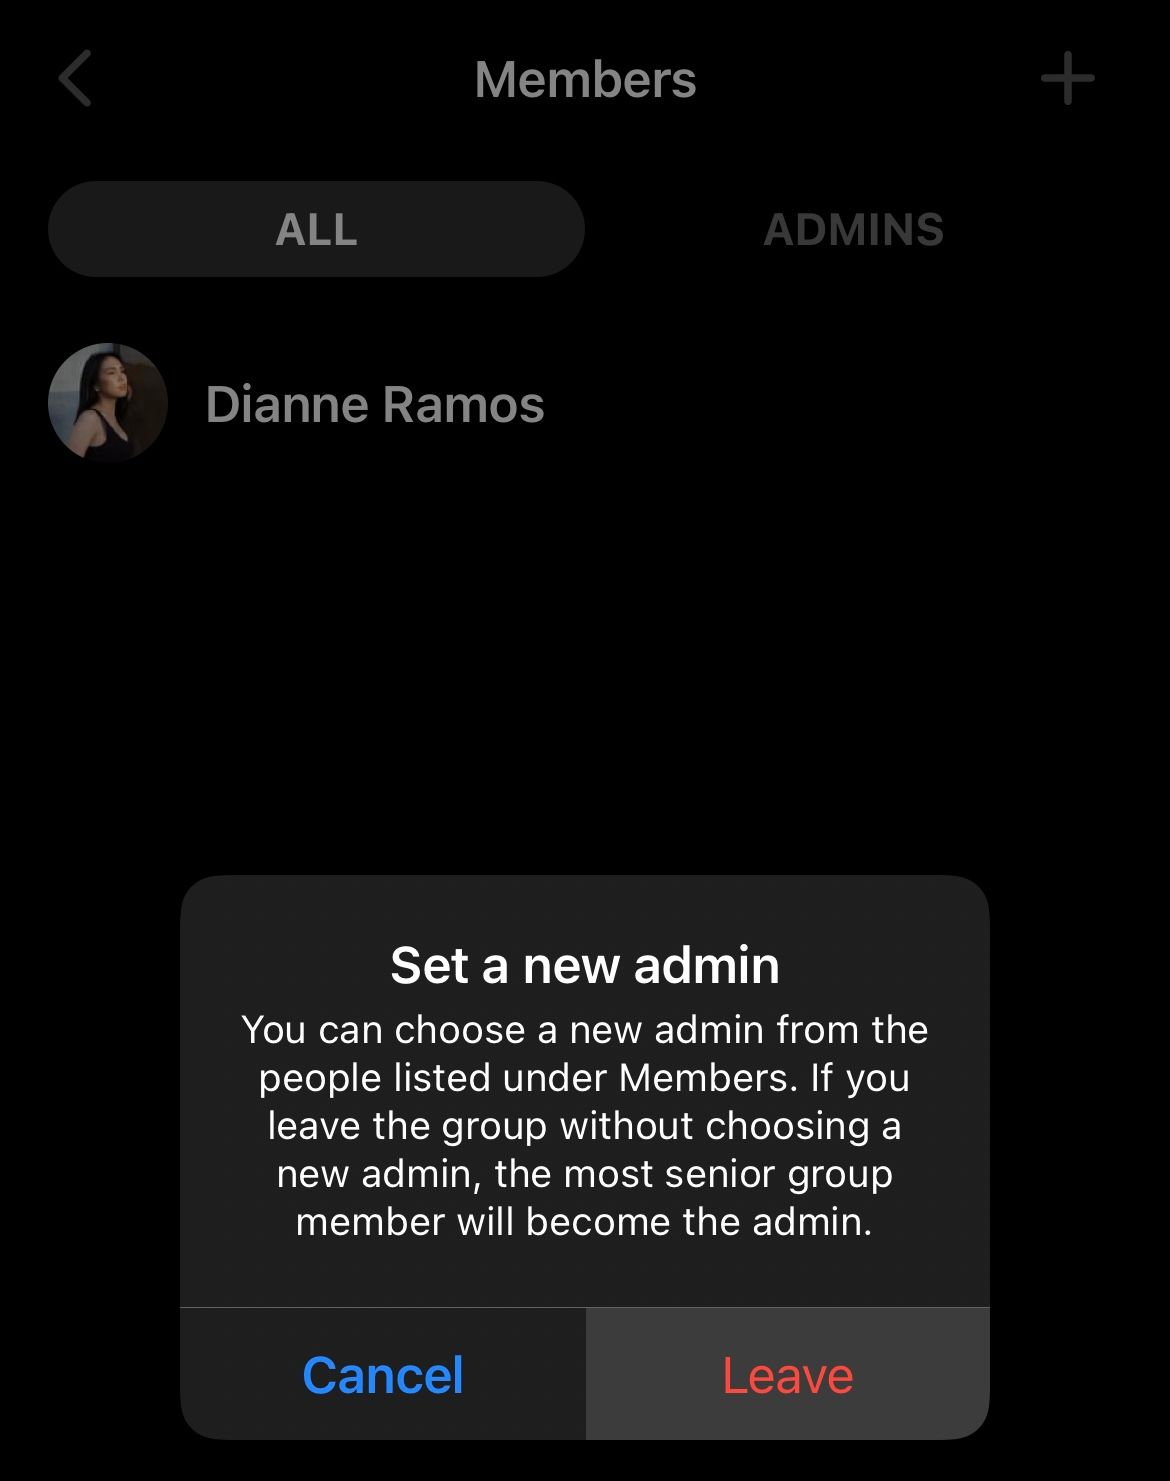
Finally, a pop-up message will appear when you select the 'Leave Group' option.
This pop-up message asks you to select a new group member as an admin.
It also states that if you leave the group without choosing an admin, it will automatically choose one.
The senior member of the group chat becomes the admin.
This won't be an issue for you since you've already removed all the group members from the chat.
So Facebook Messenger has no one to choose as an admin for the group chat.
There are two buttons at the end of this pop-up message: 'Cancel' and 'Leave.'
Click on the 'Leave' button to permanently delete the group chat.
Final Thoughts
There are two approaches to get rid of that unwanted Facebook Messenger group chat.
1. Deleting the group chat via the Facebook Messenger app
2. Deleting the ground chat via the Facebook Messenger website
To delete the group chat via the website, open your browser.
Then, search for facebook.com, Facebook's official website.
Log in with your credentials and select the messenger option from the toolbar.
The process of deleting the group chat remains the same as above.
After you delete a group chat, it disappears from your phone.
But the other members will still have it on their messenger.
They can't chat in it, as they are no longer group chat members.
They can delete the group chat, so the group no longer exists.